Friday, July 30, 2010

Dear Old Grandfather Touch-Up

Step #1 - Like step #1 in the Family portrait assignment, increase the canvas size, and duplicate the picture to the right side.
Step #2 - Using the clone stamp tool, remove the crease from the center of the image, and blend the roof, jacket, horse, ground and border to the other side of the crease. Also, fix the old man's left eye with the stamp tool.
Step #3 - Take the same actions with the image involving the Dust and Scratches option and history brush as with the Family portrait, to fix the new copy.
Step #4 - Using the quick mask tool and a brush, select the various parts of the picture that you want to apply a color to, and save these selections. To make these selections, load previous selections and subtract from the current selection to make sure that no parts overlap.
Step #5 - Load selections one by one, and using the Hue and Saturation window, give the pieces of the picture a color.

Family Portrait Re-Touch Project

Step #1 - Create a duplicate of the picture at the right, and increase the canvas size in order to put the picture on the other side.
Step #2 - Using Photoshop and the Stamp clone tool, remove the tape from the top and the bottom, taking care to preserve the photographer's signature.
Step #3 - Then, under Filter, Noise, use the scratches and dust option. Under this, put the 1st setting on the lowest so that you can't see the dust, and then the threshold at a level that will make the picture clearer, but not pixelated.
Step #4 - Take a snapshot of the original without the tape, and then another with the dust and scratches option done. Name this snap shot blur, and setting it as the source, use the history brush to select the dust and scratches and get rid of them using the blurred image.
Step #5 - Take the nose from one of the other men, and copy it onto the seated man's face (make sure to put it in a Heal layer). Using the transforming box, shape the nose and size it, then go into the heal layer and erase the excess skin (set the opacity down to check the positioning).

Wednesday, July 28, 2010

Girl Edit

Step #1 - Open the top picture in Photoshop and then increase the canvas size and copy the picture as a new layer to the bottom
Step #2 - Using the wand tool, select the background and then save the selection as BG.
Step #3 - Using the healing brush, cover up the blemishes in a Heal layer and, using the same tool, get rid of the glare off of her forehead, cheeks and her nose.
Step 4 - After flattening the layers, put a Gaussian blur over her face, and erase the blur off of the details you want to stay vivid. Load the BG selection, and then hit the delete key to make her head crisper. Lower the opacity of the blur over her face in to give her flawless skin.
Step #5 - Using the quick mask tool on the eyes, and changing the hue/saturation in a new adjustment layer will change the color of her eyes.
Step #6 - For Eye-Shadow Make-up, make a new adjutsment layer, check colorize, choose a color in hue/saturation, then fill box in layer with black. Then paint the desired areas over the eyes with a whte brush.
Step #7 - For the lips, use a quik mask and select the lips. Save this selection, an then jump to new layer. In the new layer, change the layer mode to screen and do hue/saturation again.

Tuesday, July 27, 2010

Travel Ad Design

Step #1 - Using Photoshop, apply a background in a bottom layer and expand the canvas size, as with the NextCo Assignment.
Step #2 - Find images online that work with your background, and organize them in a way that expresses the message you want translated by your travel ad.
Step #3 - Use the gradient quick masking tool to blend the images together with your background.
Step #4 - Using the type tool and the Fx tool, create the headline and text you want on the cover of your page.

NextCo Ad

Step #1 - Using Photoshop, increase the canvas size to above the original image. Apply a gradient behind the original and, using the gradient quick masking tool, blend the back gradient into the image's original sky.
Step #2- Crop the cell phone picture, and drag it onto the city landscape picture, and using the same gradient quick masking tool and the delete button, blend the picture into the rest sky. Repeat this process with the picture of the airplane.
Step #3 - To do the Text in the lower left corner, Right "NextCo" in a fat font, and then using the Fx button, try different effects (Bevel and Emboss, Drop Shadow, etc.)
Step #4 - Use the same tool for "For the way you live", but different effects.

Monster Project

Step #1 - Using InDesign, demonstrate use of columns, super script, drop shadow, line tools, starburst shape tool, fonts and coloring, frame tool, and leading.

You're Invited! - Invitation Card

Step #1 - Find a birthday image online, and, using PhotoShop, position the image on a birthday invitation card to be opened any desired way.
Step #2 - Put the Type on the card with eye-catching type, and put the desired message on the front of the card, and then put "Designed by: Name" on the back of the card.

Los Angeles Zoo Postcard - Resampling and Remapping Exercise

After learning about Resolution and Resampling Down and Remapping Up, we amde this postcard for the LA Zoo

Step #1 - Using PhotoShop, crop the parts of the images you want to keep, and apply a stroke to the border of the picture. Then put the small images onto the postcard beneath a larger picture with a stroke above. Align them with each other and allow space for a stroke around the entirety of the postcard.
Step #2 - Apply a background to the postcard, and then use a contrasting color for the body copy. For the headline,use contrasting fonts.

Marble Paper Dying Completed Notepad

Step #1 - Take a pan of water and spatter bits of oil-based paint into the dish, and using a popsicle stick, swirl the paint in a design. Lay a sheet of white paper in the dish and press it against the surface of the water, and let the paint settle into the paper. Do this a few times, each time with new paint and paper, and let the paper dry.
Step #2 -After drying, cut the paper using pencil, a guide, and scissors, two pieces smaller than the other two. Glue the larger pieces to the outside of two pieces of cardboard, one cardboard rectangle made out of two pieces taped together. The edges are bent over the cardboard, and glued. Then, glue smaller rectangles from another piece of marbled paper on the side of the cardboard that still shows. Let the glue dry.
Step #3 - After drying, jog the pieces of marble paper covered cardboard with a stack of recycled paper, and make sure they are aligned at the top. Drill two holes in the top, the front being the cardboard rectangle made of two pieces of cardboard. Then put screws through the holes and into a backing. Tighten this until the cardboard is snug against the paper.

Commodities to Culture Postcard

Step #1 - Using 9 + images of commodities in today's culture, use the various tools in Photoshop (Wand, Quick Select, Crop, Marquee, Lasso, etc.) to separate the images from their backgrounds (the more complex the background, the better).
Step #2 - Organize them on a 6 x 8.5 inch postcard with each picture in its individual box, arrange the grid boxes on the postcard in a way that shows off the products within them and out of the way in order to leave space for the body copy text, the creatively designed headline, and the company's name.

Thursday, July 22, 2010

Personalized Notepads

Step #1 - Design layout using Adobe Illustrator using symbols, shapes, and type.
Step #2 - Print out 50 copies of each design.
Step #3 - Cut into two separate stacks of paper using guillotine cutter, then jog together and glue along top edges.
Step #4 - Reapply glue in 3 even coats, and let dry over night.
Step #5 - cut two stacks away from each other using knife.

Completed Black Square Project Book (Cover and Bio)

Step #1 - Using Adobe InDesign, make a copy of the first page of the book that had the cover and the last page, then delete the other pages.
Step #2 - Write a Designer Biography in Microsoft Word and put it on the blank side of the first page upside down in order to be readable when printed and bound to the rest of the book. Print it out slightly bigger than the rest of the pages so that it covers the book, then bind it (staple) to the book.

Animation Magazine Project

Step #1 - Draw an animated character on paper, then scan it into Adobe Photoshop.
Step #2 - Using Illustrator, trace the outline with the pen tool and then keeping an outline on top of the hand drawing. Then, using all of the functions of the pen tool and layer options, add detail, apply shadow, and add color.
Step #3 - Put the animation on a 7 x 10 inch canvas and add three teasers to illustrate the front cover of an Animation magazine. Add a title, subtitle, barcode, a volume number and a date to make it even more realistic as a magazine cover.

Friday, July 16, 2010

Type Specification

Step #1 - Learn about the different types of font (Conchordant, Contrasting, Conflicting)
Step #2 - Learn about Kerning and Leading, Serif, Sans Serif, and Script fonts, and the measuring of type using points.
Step #3 - Copying the type samples written on a worksheet and organizing the characteristics of the type samples in small tables.

Space Soccer Project


Step #1 - In Adobe Illustrator, using symbols and layers, design the first page of a magazine article describing Spain's win at the World Cup and it's galactic intensity.
Step #2 - Using Adobe InDesign, take type from the internet and put it on the artwork.

Tension (n.)- mental or emotional strain; anxiety

Playful (adj.)- full of play or fun

Order (n.)- conformity or obedience to law or established authority

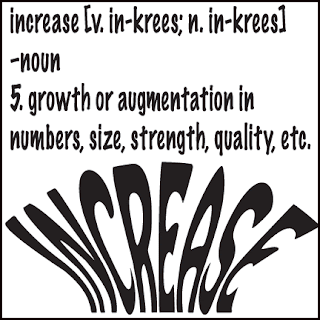
Increase (n.)- growth or augmentation in numbers, size, strength, quaility, etc.

Bold (adj.)- Not hesitating or fearful in the face of actual or possible danger

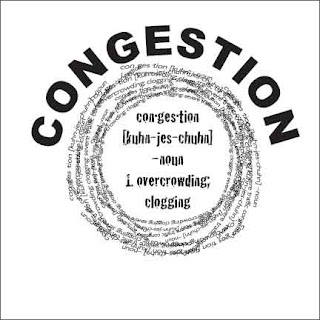
Congestion (n.)- overcrowding; clogging

Steps for all Black Square Posts
Step #1 - Using Adobe Illustrator, create 6 sets of 4 black squares of equal dimensions (in their respective foursomes).
Step #2 - Using these sets, arrange and transform the 4 black squares in 3in. x 3in. boxes in a way that portrays various nouns and adjectives.
Step #3 - Create 3x3 boxes for each word illustrating their definition using black and white type and various transformations in Illustrator.
Step #4 - Organize and arrange the artwork and definitions in a book using Adobe InDesign with a Cover Page and Designer Bio.